How to Export Files Using Adobe InDesign
Best Settings for Exporting your Files Using Adobe Indesign
We recommend using the below settings if you are working with typical colour images. If you are using unusual images or pushing boundaries, we advise you to work with a repro house to establish the most appropriate settings for your work.
Using the screenshots and instructions shown below, ensure that your file is properly prepared with all fonts & images linked to ensure your InDesign file is ready for export.
- File > Export > Name with .pdf and Save
- Follow the instructions below to create a preset suitable for Imago and our printing partners
Step One
- Go to File > Export.
- In Format select Adobe PDF (Print).
- Name the file, select where to place your saved PDFs, and then click Save.
- When the Export PDF settings then come up, right at the top where it shows the Abobe PDF Preset, select None and then edit that as shown here.
Step Two
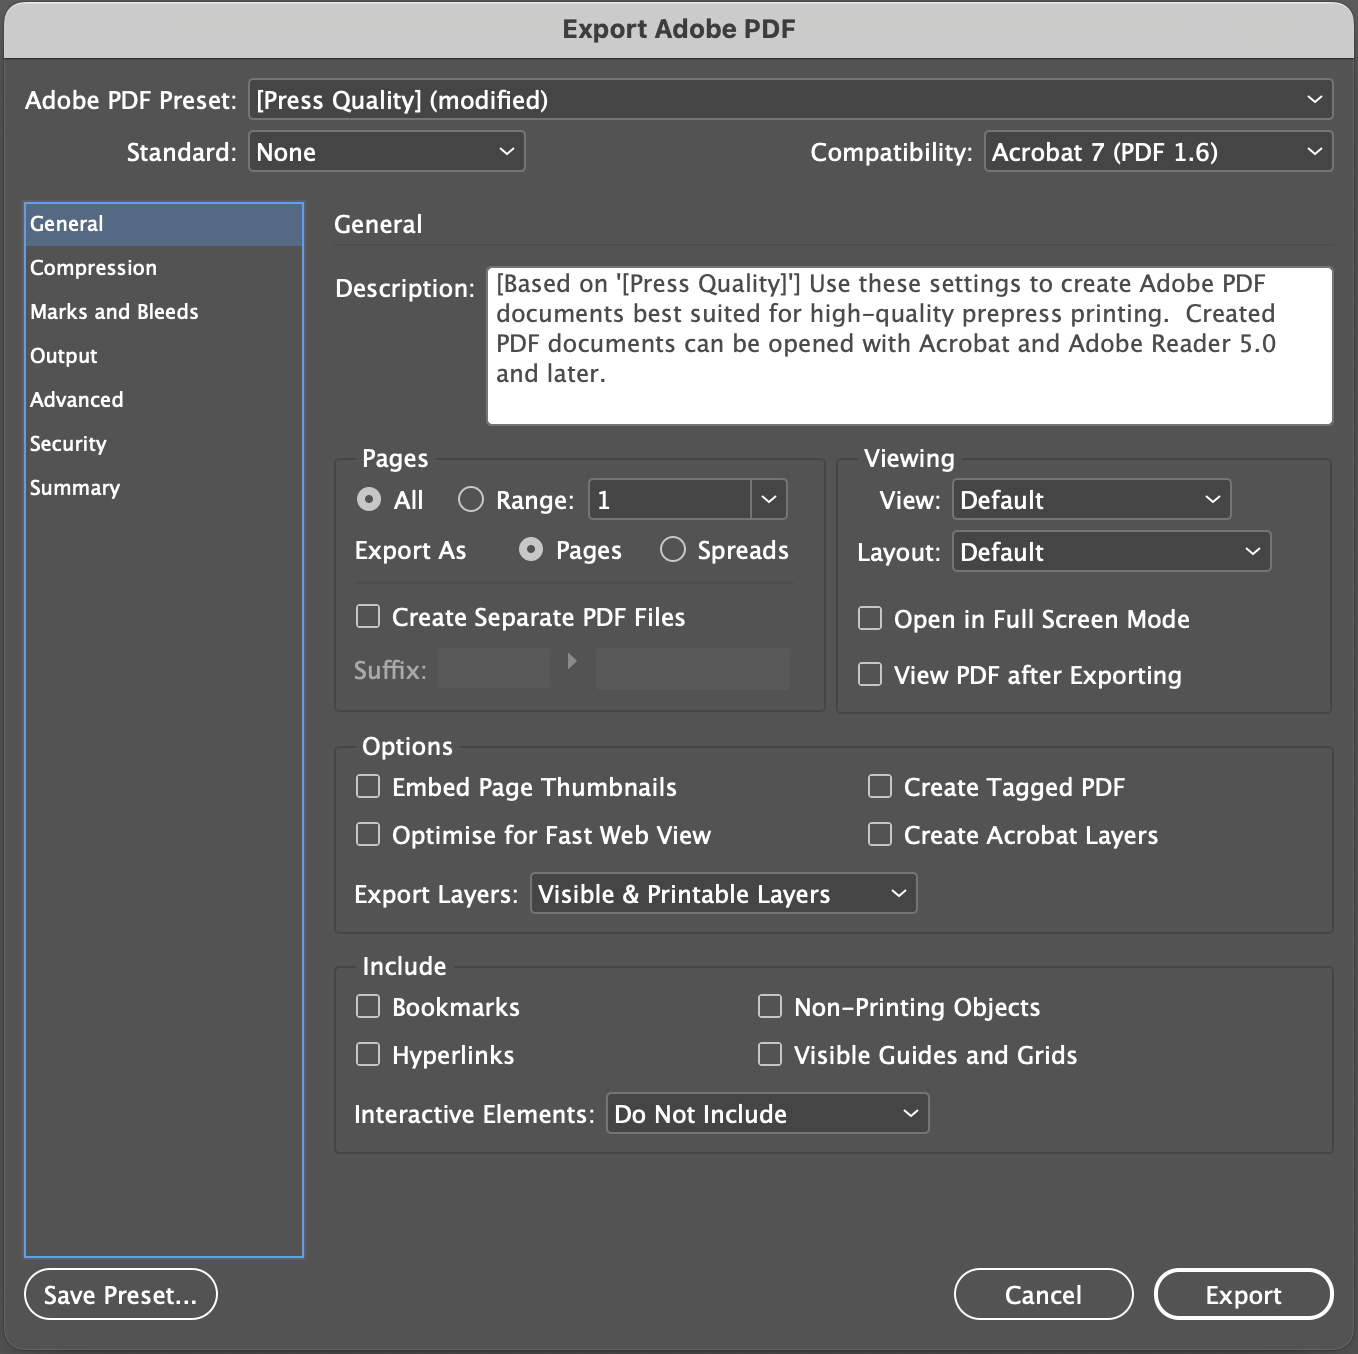
- The General tab should then be almost correct.
- Check that Standard is set to None and Compatibility to Acrobat 7 (PDF 1.6).
- Ensure that Pages are set to ‘On’ and that you include your page range for the PDFs (if you’re not exporting the entire document)
- For best results, please ensure that the boxes which are checked and unchecked match the image provided.

Step Three
- Click the Compression tab
- Set Colour Images to 350 for images above 525
- Set Compression to Automatic
- Set Image Quality to Maximum.
- Set Greyscale Images to 350 for images above 525
- Set Monochrome to 2400 for images above 3600
![Screenshot 2024-10-28 at 12.59.07[81]](https://imagogroup.com/wp-content/uploads/Screenshot-2024-10-28-at-12.59.0781.png)
Step Four
- Click on Marks and Bleeds
- Enable all Printer’s Marks except Colour Bars
- Set your Bleed and Slug to 5mm (it’s also OK to use 3mm, but no less*).
*The advantage of setting higher is if PDFs are later re-used to smaller size
![Screenshot 2024-10-28 at 14.40.51[92]](https://imagogroup.com/wp-content/uploads/Screenshot-2024-10-28-at-14.40.5192.png)
Step Five
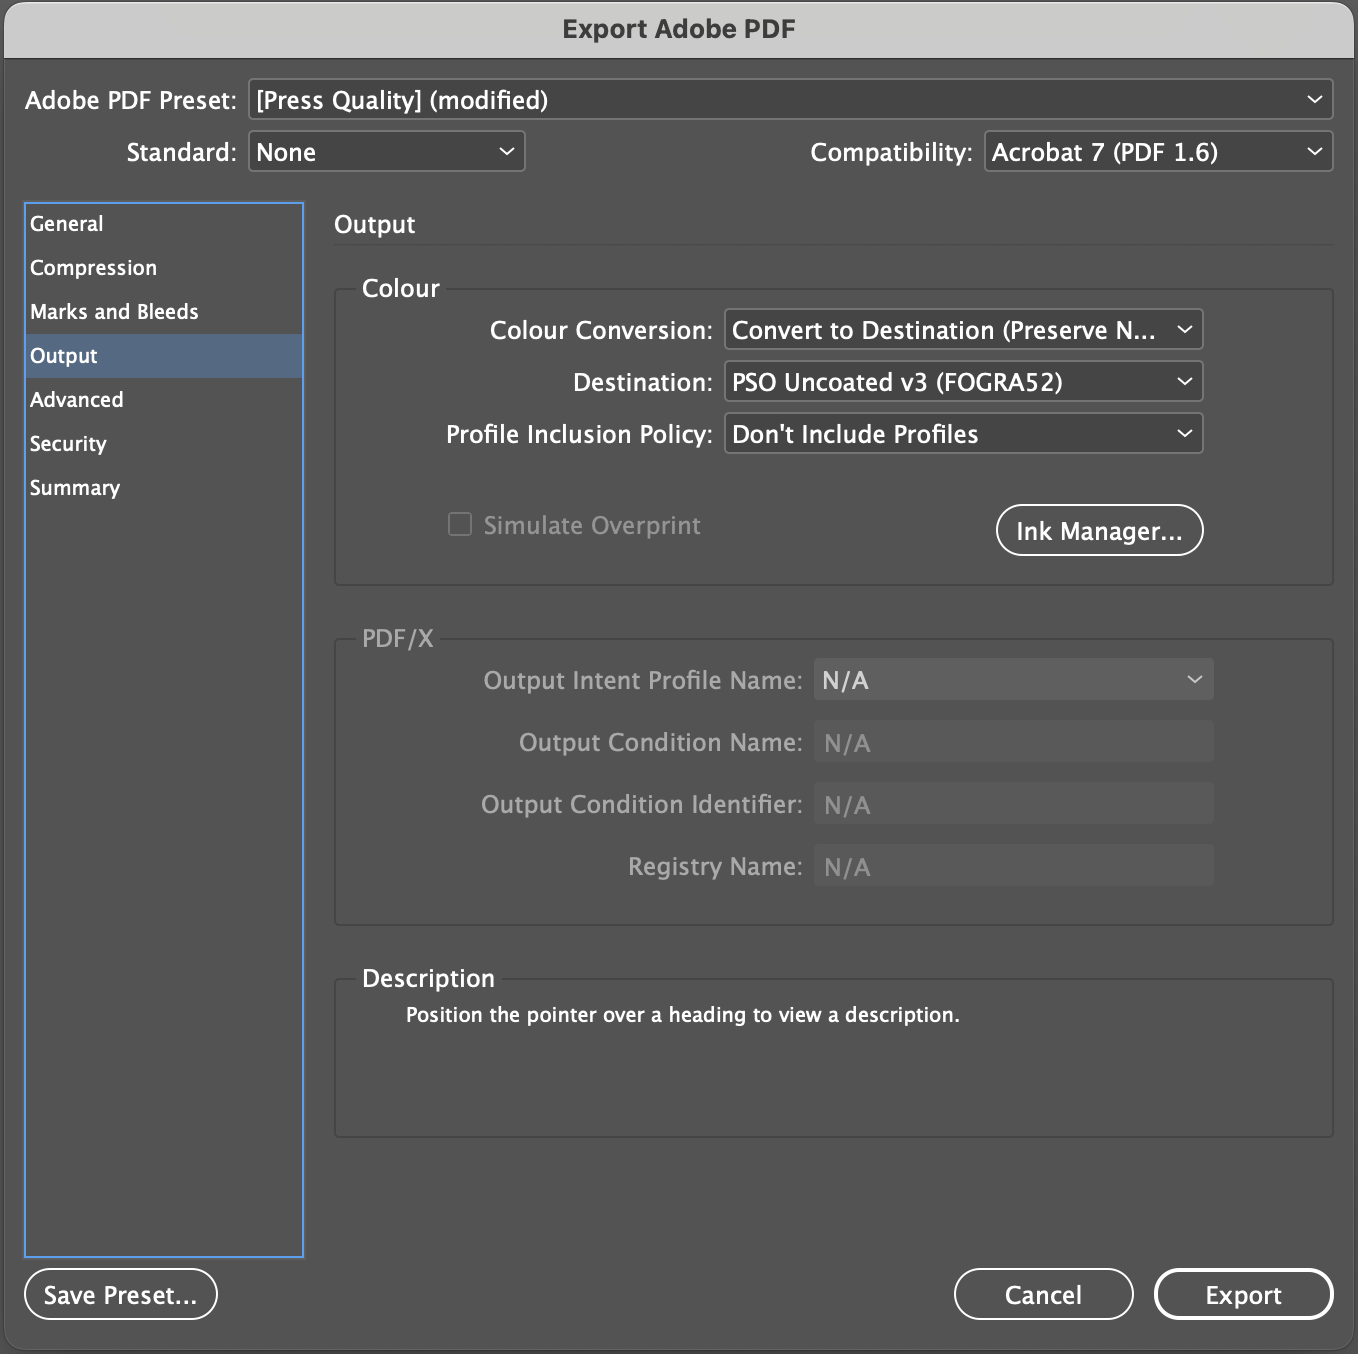
- Select Output
- Select Colour Conversion as shown to Convert to Destination (Preserve Numbers)*
- Set Destination to Document CMYK– PSO Coated V3 (Fogra 51) or PSO uncoated V3 (Fogra 52), or with your appropriate CMYK profile*
- Set Profile Inclusion Policy to Don’t Include Profiles.
*In Output, it is important to select ‘Preserve Numbers’ to prevent type or tints from changing colour in the PDF conversion.
**Find Out How to Set Up Fogra 51 and 52 Colour Profiles
***If using Rhodamine, or spot colours & no CMYK, then select No Colour Conversion.
**** Don’t Include Profiles is important so that pdf files exported from InDesign don’t embed profiles.

Step Six
- Select Advanced
- Ensure the Language under Accessibility Options is English
![Screenshot 2024-10-28 at 12.59.49[54]](https://imagogroup.com/wp-content/uploads/Screenshot-2024-10-28-at-12.59.4954.png)
Step Seven
- Select Security
- Ensure no security settings are checked as shown.
![Screenshot 2024-10-28 at 13.00.01[20]](https://imagogroup.com/wp-content/uploads/Screenshot-2024-10-28-at-13.00.0120.png)
Step Eight
- Select Output once again
- Select Ink Manager
- This is a quick way to check that all the colours are in CMYK. Spot colours can be changed here to CMYK by clicking on All Spots to Process.
Step Nine
- Then Save the Preset and name as you like. Shown in the images above as [Press Quality] (modified).
![Screenshot 2024-10-28 at 13.00.35[55]](https://imagogroup.com/wp-content/uploads/Screenshot-2024-10-28-at-13.00.3555.png)
If you need any support with setting up your files for print, please do get in touch with us at Imago for assistance using the contact form below.